Homepage & Shortcodes

With BA Tours you will have nice wide and clean landing page. To get full advantage of this and present your Homepage in the best possible way you can use plenty of build-in theme shortcodes listed below.

By default, WordPress shows your most recent posts in reverse chronological order on the front page of your site. To create the static front page:

  • go to the Pages > Add New menu, add shortcodes in the content area and publish new page
  • then go to Administration > Settings > Reading panel, set Front page displays to a static page, and in the drop down menu for Front Page select your page.

If you are not familiar with using WordPress shortcodes, please follow the Shortcode section of the official WordPress Codex.

top-tours

Use this shortcode to display all your tours in compact clear style. Example: [top-tours title="Popular Tours" ids="80, 81, 82"]

Shortcode params:

  • title‘ – main title before content
  • ids‘ – comma separated list of selected tours (optional)
  • per_page‘ – defines number of items to display (10 by default)
  • sort‘ – ‘DESC’ or ‘ASC’ (DESC by default)
  • sortby‘ – ‘price_from’ or ‘rating’ (‘rating’ by default)

special-tours

With this shortcode you can attract more attention of your customers to special tours. Example: [special-tours ids="32, 83" title="Special Tours"]

Shortcode params:

  • title‘ – main title before content
  • ids‘ – comma separated list of selected tours (optional)
  • per_page‘ – defines number of items to display (10 by default)
  • sort‘ – ‘DESC’ or ‘ASC’ (DESC by default)
  • sortby‘ – ‘price_from’ or ‘rating’ (‘rating’ by default)

selected-pages

Use this shortcode to display list of selected pages/posts on the front page. Example: [selected-pages ids="179, 181"]

Shortcode params:

  • title‘ – main title before content
  • ids‘ – comma separated list of selected pages/posts (optional)
  • taxonomy‘ – used if ‘ids’ is not defined, and taxonomy assigned to pages/posts
  • post_type‘ – ‘page’ by default
  • per_page‘ – defines number of items to display (-1 by default)
  • sort‘ – ‘DESC’ or ‘ASC’ (ASC by default)
  • sortby‘ – all accepted by wp function get_posts (‘title’ by default)

features / feature

It’s a two shortcodes combo where [feature] shortcode presents each of your feature and [features] wraps them into a single block:
[features title="Why choose us?"][feature title="Best Price!" fa_class="fas fa-thumbs-up"]Lorem ipsum[/feature][feature title="Tickets included" fa_class="fas fa-ticket-alt"]Lorem ipsum[/feature][feature title="Transfer" fa_class="fas fa-bus"]Lorem ipsum[/feature][/features]

  • features ‘title‘ is for the title of the whole block
  • feature ‘title‘ is for the title of the specific feature
  • feature ‘fa_class‘ is an Font Awesome class for the feature icon
  • feature ‘img_url‘ is for use custom image instead of Font Awesome icon


reviews

This shortcode outputs carousel of user reviews for your tours.
[reviews]

Shortcode params:

  • title‘ – main title before content
  • ids‘ – comma separated list of selected reviews (optional)
  • tour_id‘ – limit reviews to selected tour (optional)
  • per_page‘ – defines number of items to display (10 by default)
  • order‘ – ‘DESC’ or ‘ASC’ (DESC by default)
  • orderby‘ – ‘rating’ or any accepted by WP_Comment_Query (‘rating’ by default)
  • autoplay‘ – 1 to autoplay slideshow (0 by default)
  • speed‘ – slideshow speed, ms (3000 by default)


tours-map

Use this shortcode to display Google map with all your tour locations marked. This map can be configured in the BA Book Everything plugin settings section.
[tours-map]

selected-tours

This is a modified version of shortcode top-tours, which is suitable for use inside pages with assigned taxonomy (see details in Theme Options). [selected-tours]

Panels & Widgets

You could add widgets to the page header and footer, to the left and right sidebars, to the areas before page header, content and footer.

Below is an example of widgets settings from demo site.


Theme Options

BA Tours theme provides plenty of options divided into several sections. In the list below, we will give you an overview.

Site Identity

Load your logo image and set your site name and tagline here.

Header

You could add your business contacts and working hours to all pages header.

Front Page

Here you can choose to use your homepage featured image in the front page header instead of slideshow.

To use slideshow you need to create slides posts via Slides menu.

Tour Page

This option allows you to show term icons in the tour page header from selected taxonomies.


General Pages

This option allows you to add custom taxonomy to the pages.

That provides you ability to create promo pages with selected tours (for SEO and customer’s usability).

Search Form

This option allows you to add an additional input field to the search form.


Search Results

This option allows you to show term icons in the tour preview item from selected taxonomies.

Add your copyrights at this section. You can use here predefined placeholders – {year} and {sitename}.


Layouts

This option allows you to choose default layout for all pages. Notice that front page will use its own layout called ‘Front page‘ regardless this option. You can also apply preferred layout to any specific page in the page editor.

Fonts

Here you can choose Google fonts for all of the site page aspects. If you want to return to the default BA Tours fonts press the ‘Reset Section‘ button.


Colors

Here you can define color scheme of your site. If you want to return to the default BA Tours colors press the ‘Reset Section‘ button.


Custom CSS

Here you can add some custom CSS to adjust your pages, override existing CSS instructions or add styles for the additional components you use.


Navigation / Menu Setup

BA Tours uses standard WordPress menu system for navigation. In order to setup your menus, go to Appearance -> Menus.

You need to create new menu and drag and drop pages you want to show. After menu is created, you need to assign this menu to a specific theme location. Primary Menu is the location for a main menu navigation bar.

If you are not familiar with using WordPress menus and its basic setup, please follow the user guide on the official WordPress Codex.


Page Layouts

BA Tours theme provides several page layouts, which are:

  • Front page‘. This layout by default applied only to the front page. It is full-width, has no sidebars and no paddings, and designed specifically for your landing page.
  • Right sidebar‘. Layout with right sidebar only.
  • Left sidebar‘. Layout with left sidebar only.
  • Two sidebars‘. Layout with both left and right sidebars.
  • No sidebar‘. Default layout for BA Tours theme – without sidebars.
  • No sidebars (wide)‘. Layout without sidebars and paddings (default for tour pages).

All the layouts, except ‘Front page’, has full support for all available widgets areas (see Panels & Widgets). Notice that you can always add different widgets to the both left and right sidebars and use different layouts (‘Right sidebar’, ‘Left sidebar’, ‘No sidebar’) for different pages to show different sidebar content accordingly to the page type.

Default Layout

You can change default layout for your pages in Theme Options -> Layouts.

Page-specific Layout

You could change layout for single page in the Pages -> Edit Page -> Page template options. Here you can also hide page title or remove the margin between the header and the page content.

Setup Tours

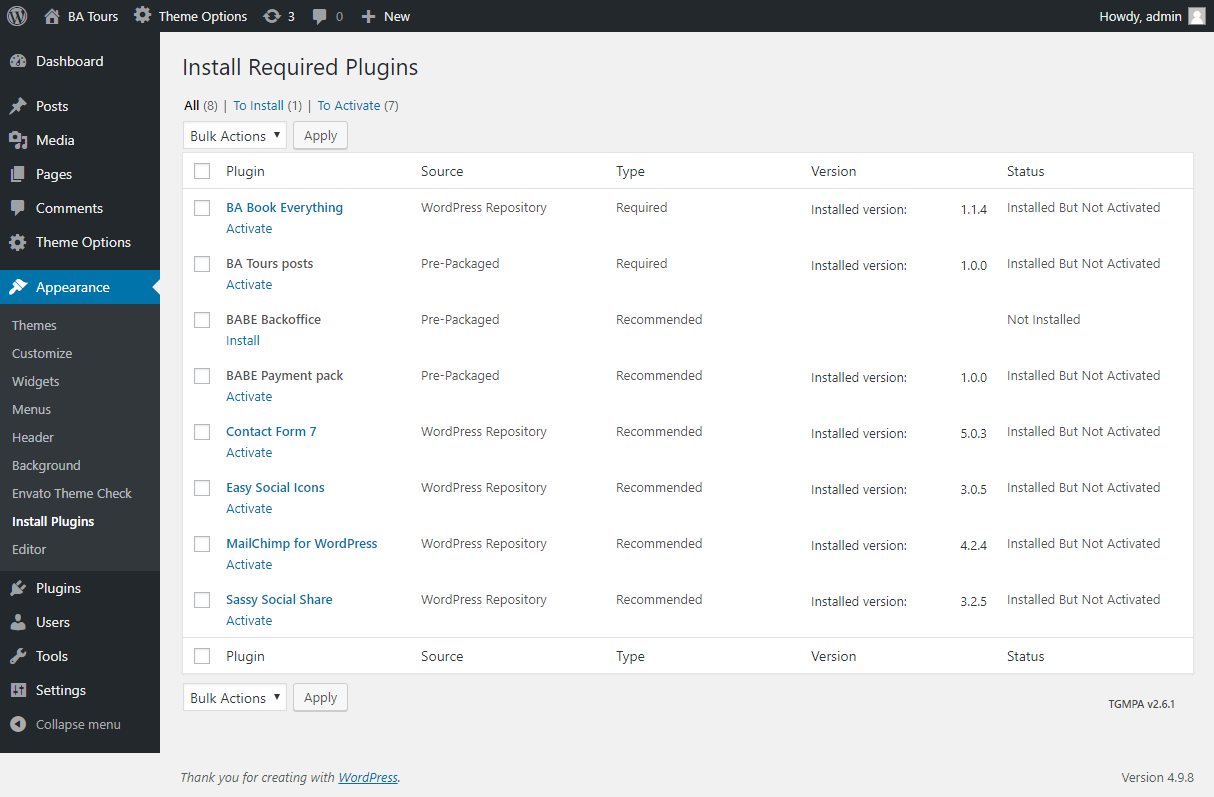
Before setup tours you have to install and activate BA Book Everything plugin as described in Recommended Plugins section.

Please follow the BA Book Everything plugin documentation to setup tour posts slug and name, currency, booking rules, categories, custom taxonomies, tours, prices,  and emails. You can also use the one-click Demo content setup feature to make it easier to start working with the plugin.

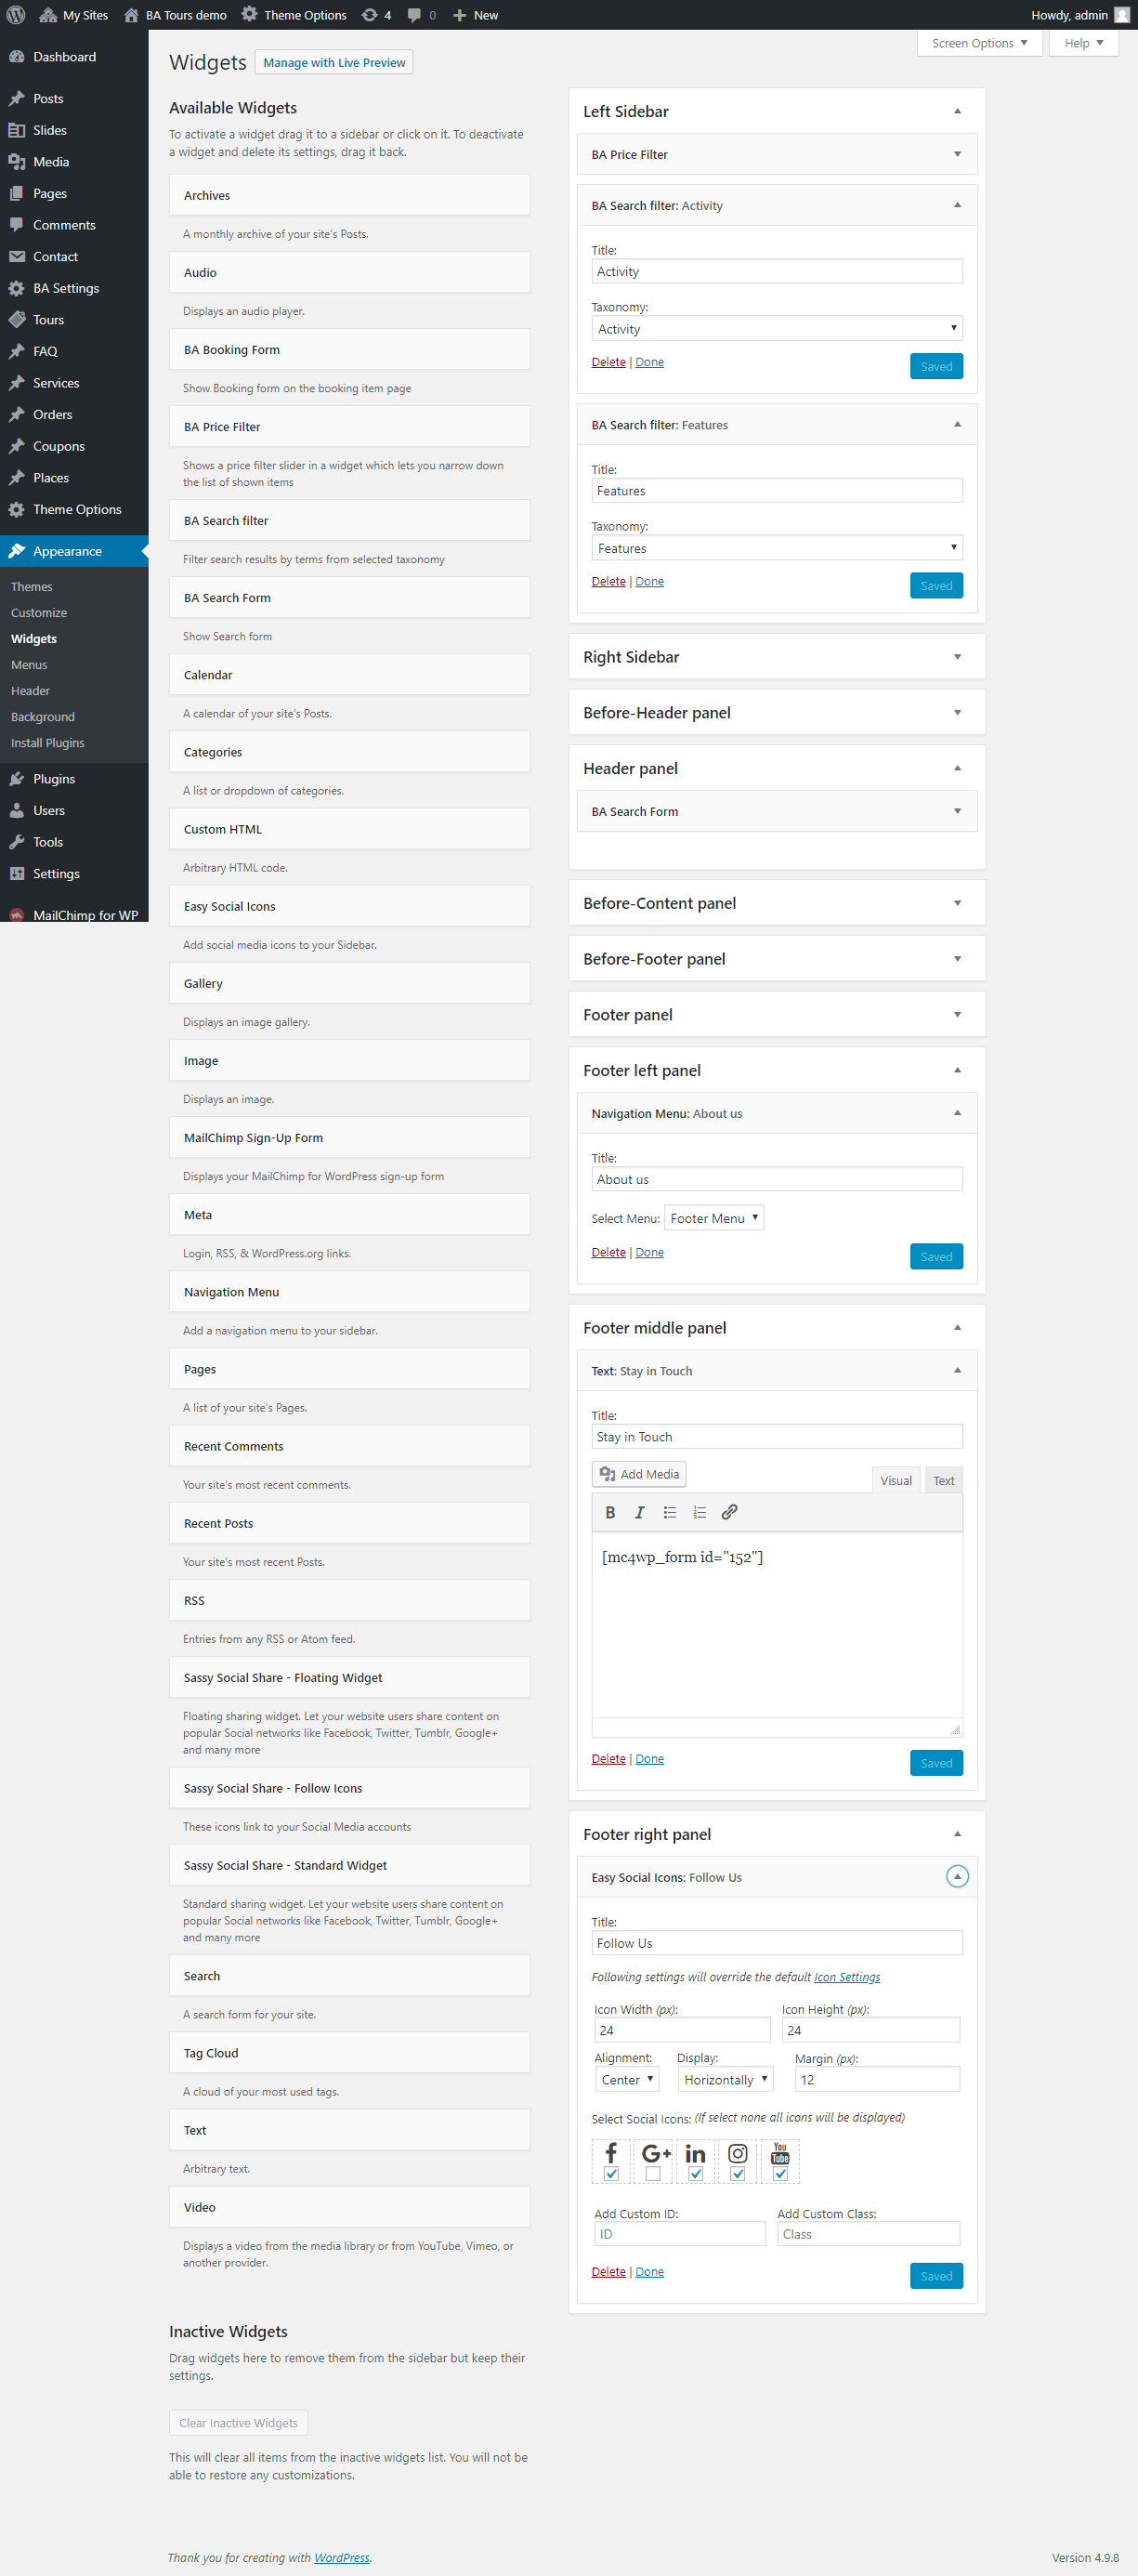
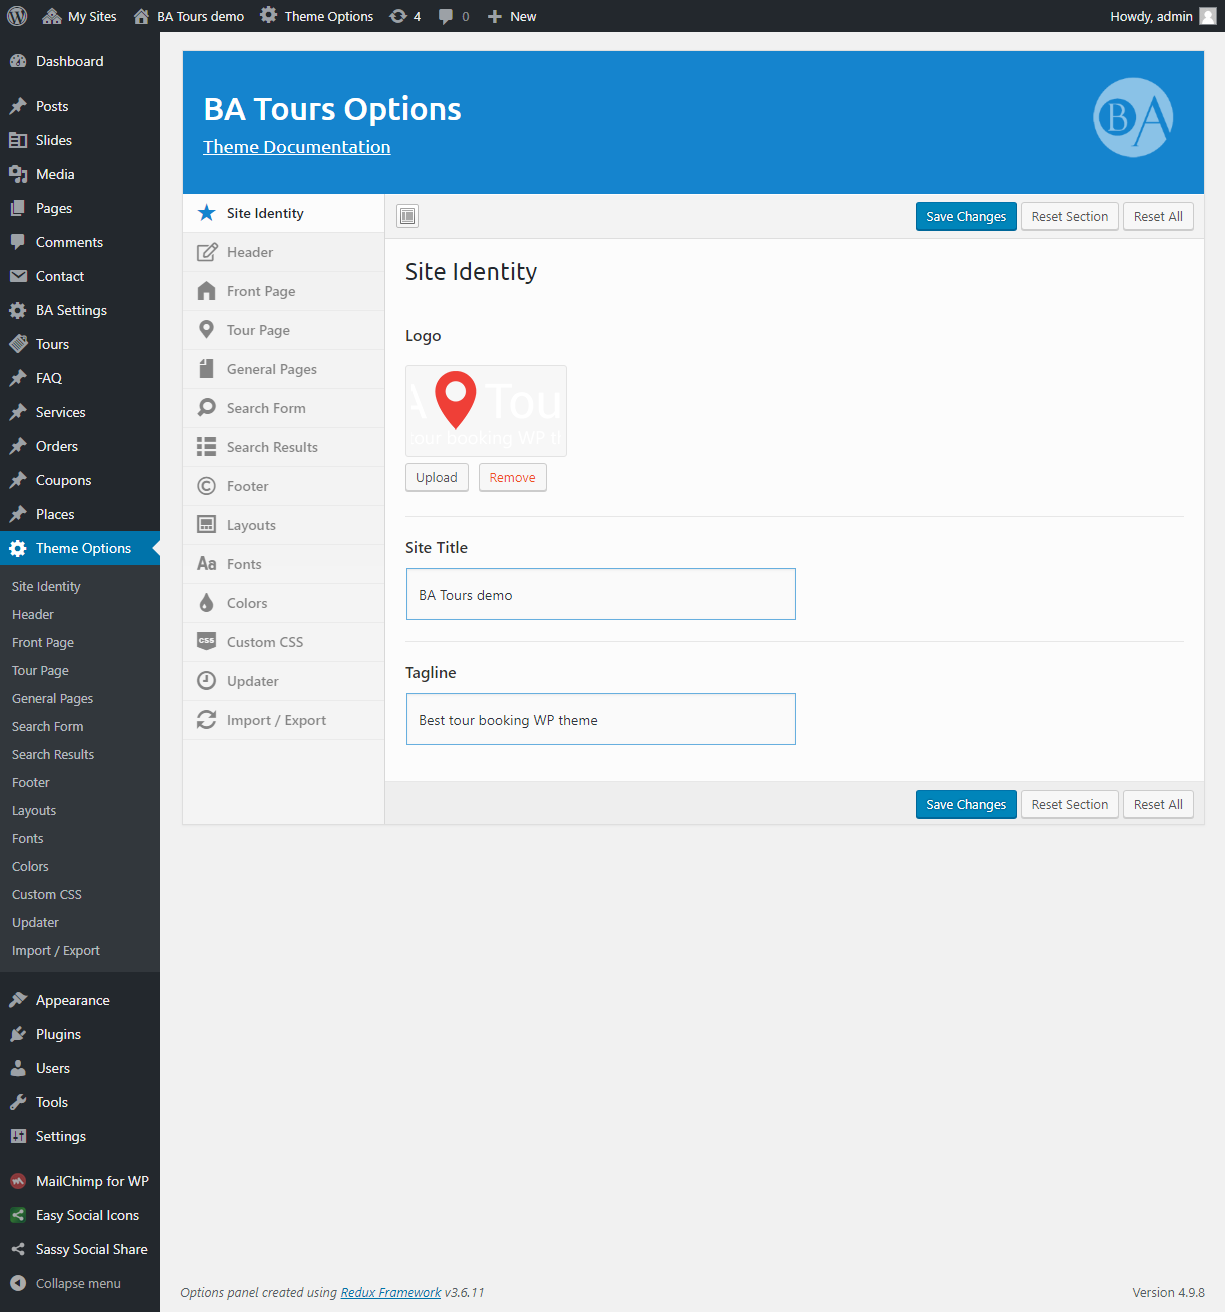
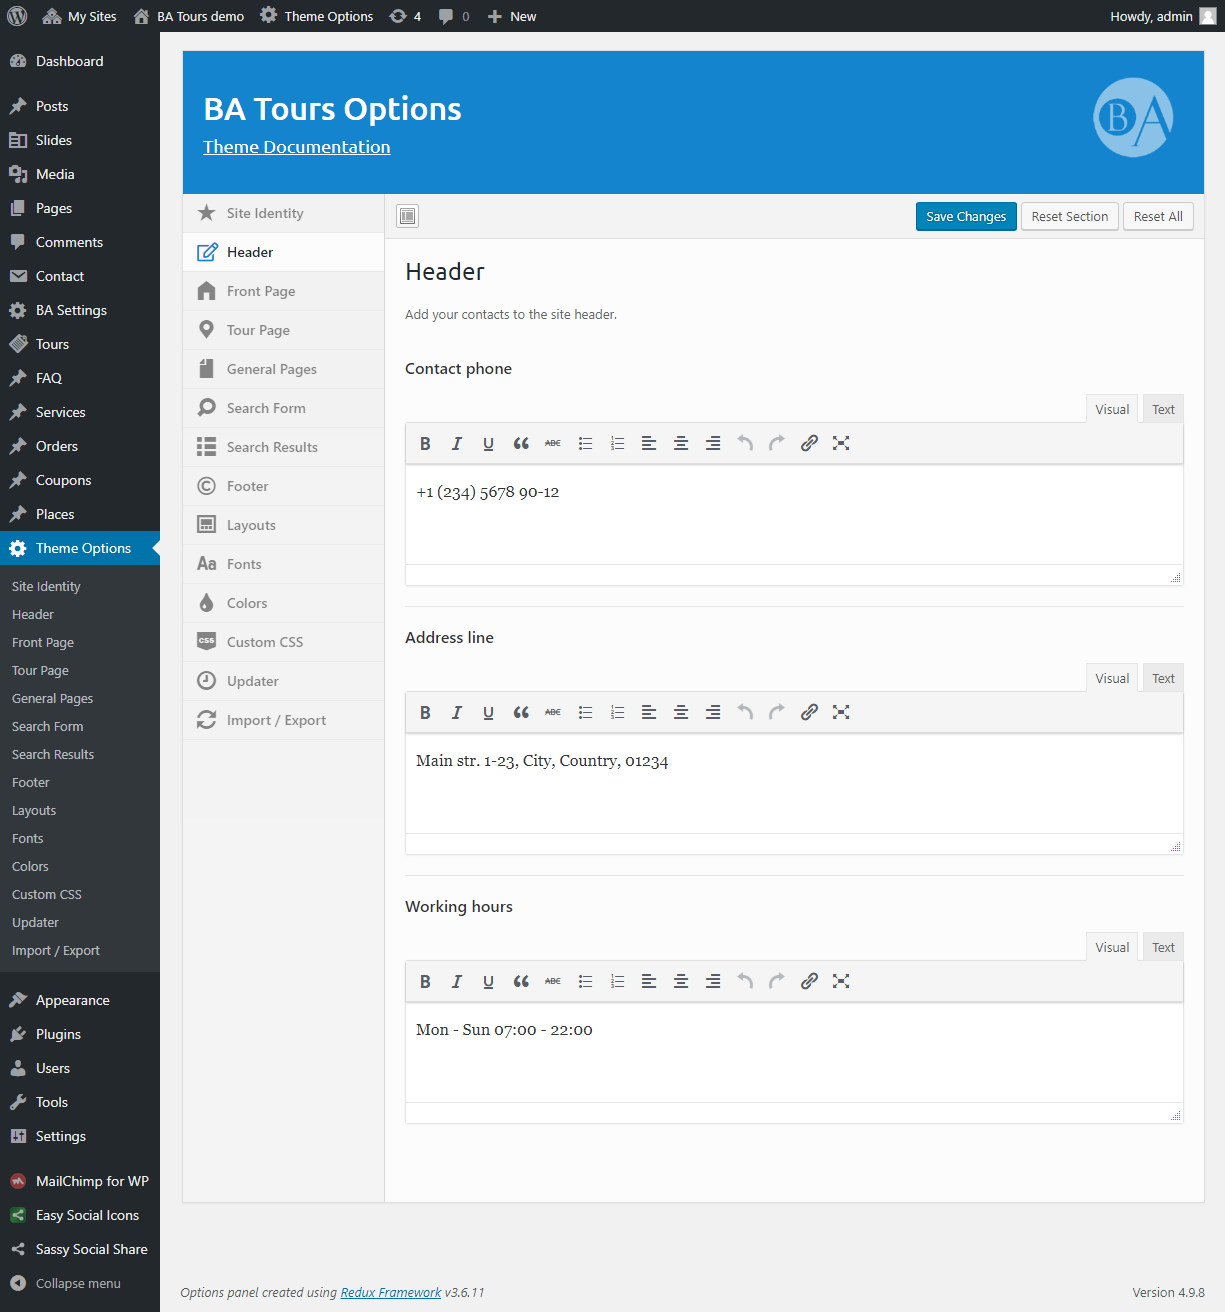
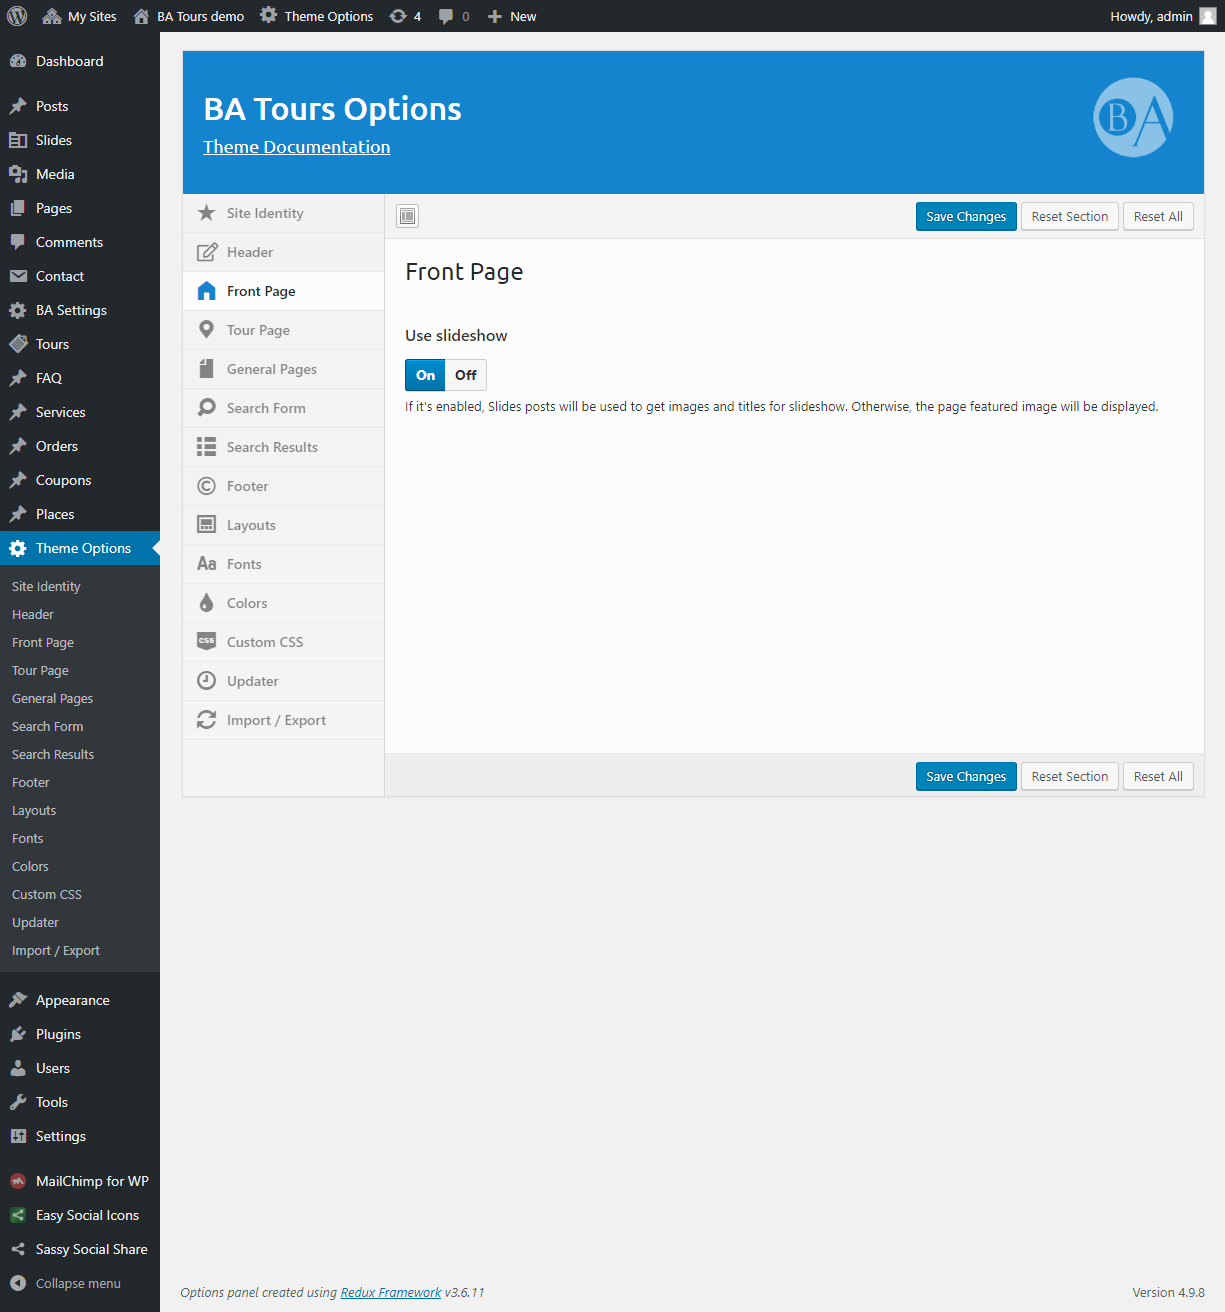
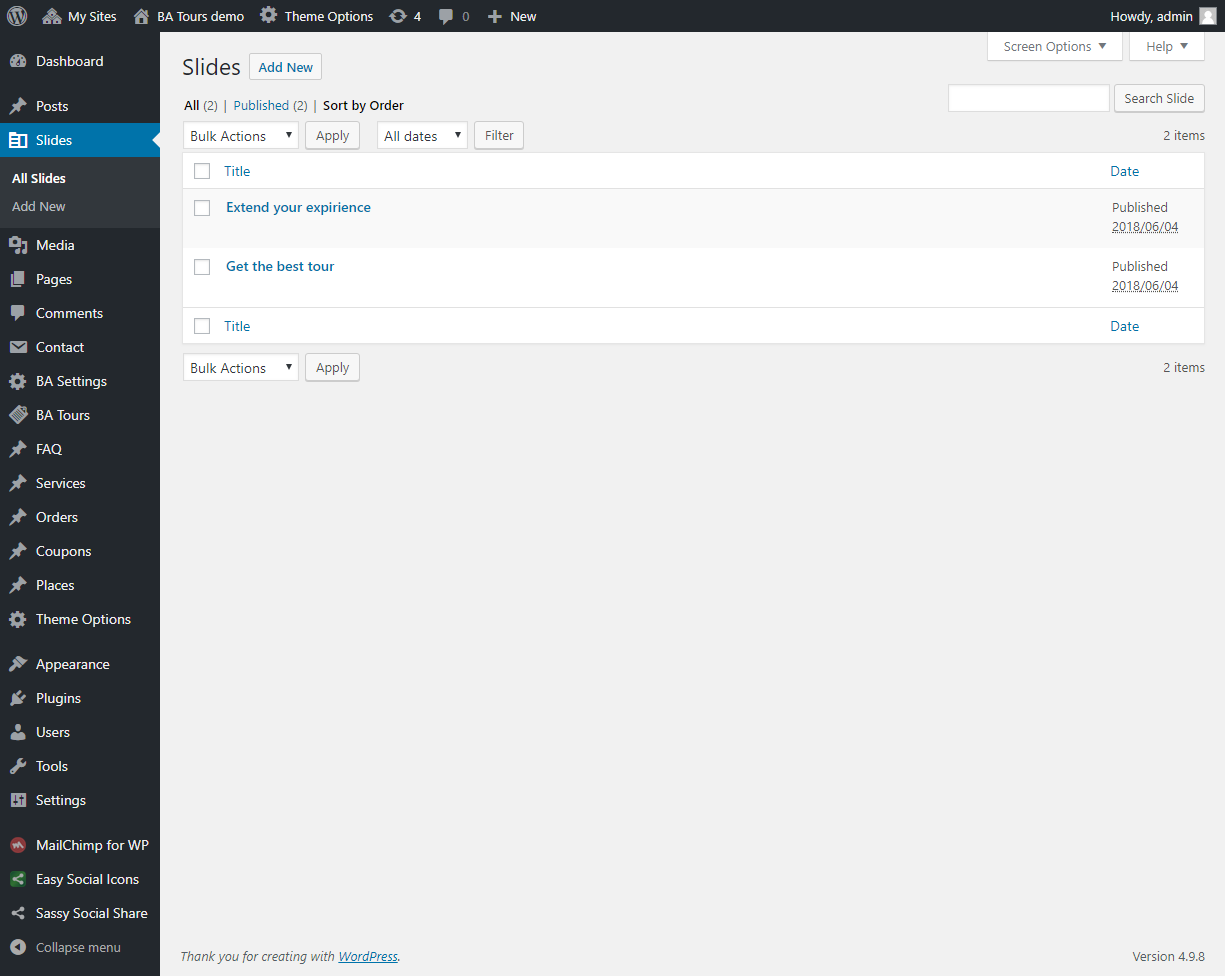
Screenshots below will help you to make your site look like a BA Tours theme demo site.

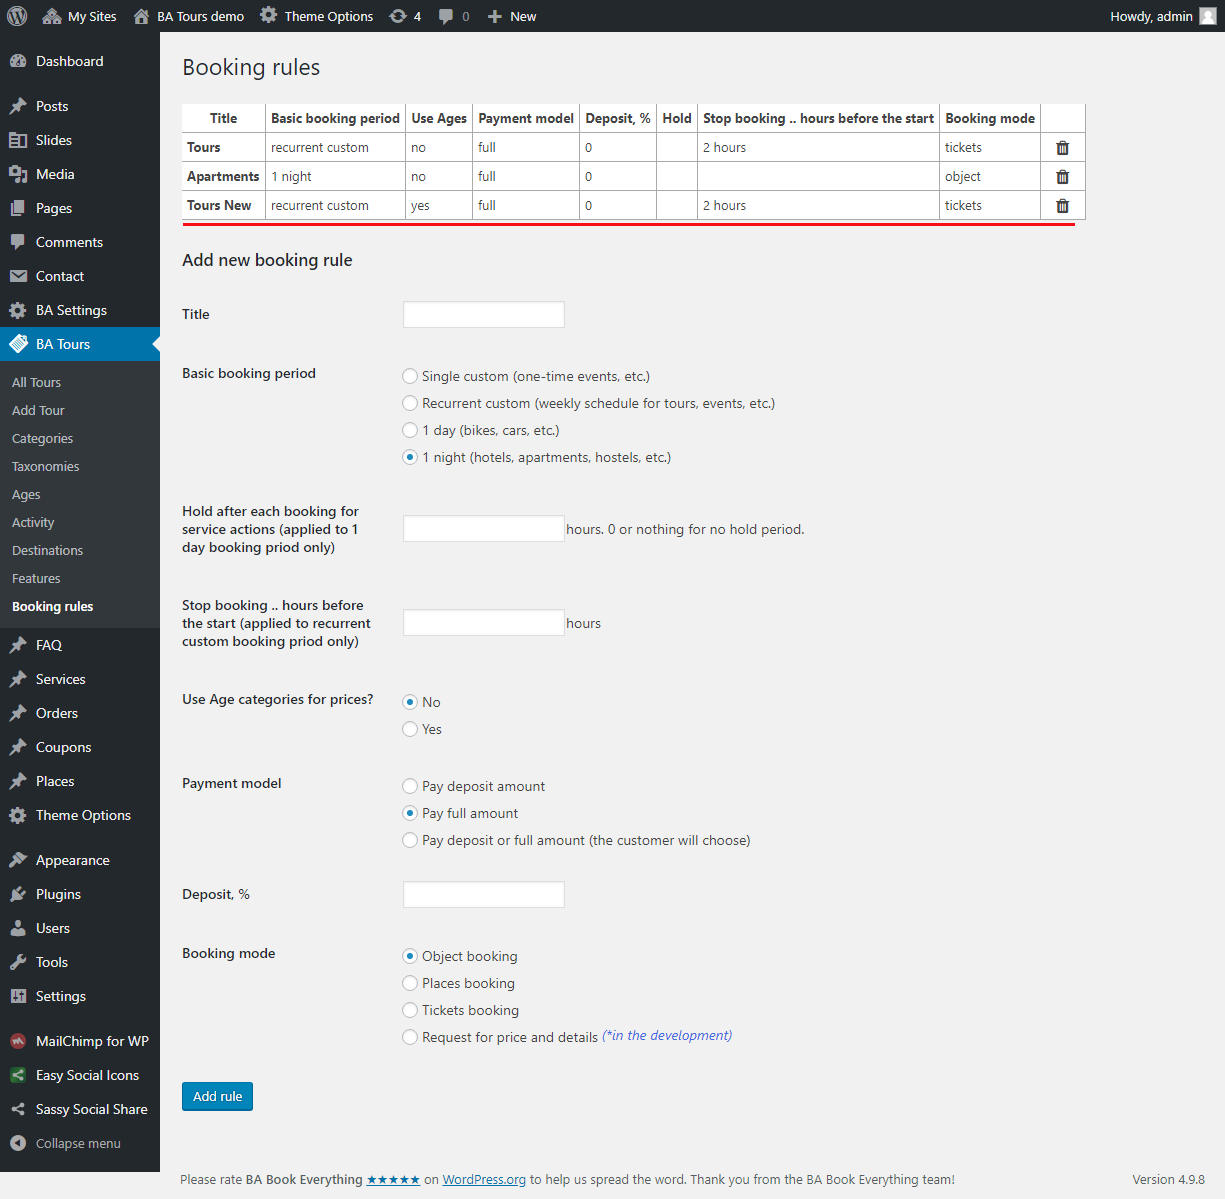
First, create booking rule with ages and reccurent custom basic booking period.


Then go to Ages menu and add needed ages.


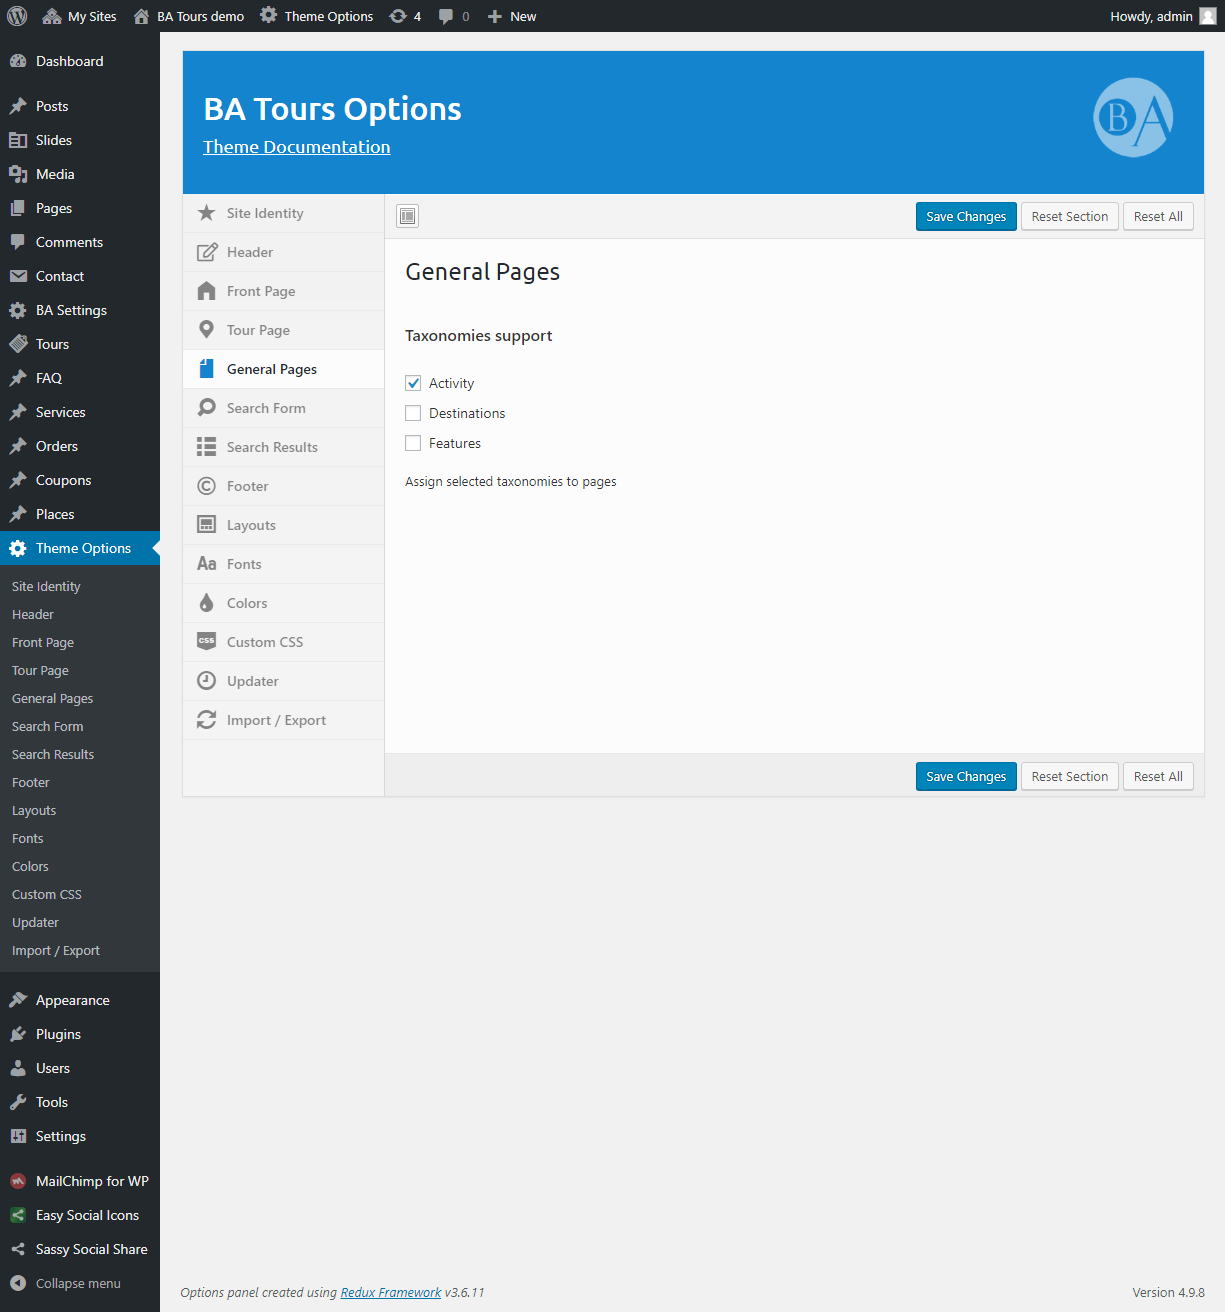
To create custom taxonomies, like Activities or Destinations, go to menu Taxonomies and add terms with needed taxonomies names. After updating the page, new taxonomies will appear in the menu below the Taxonomies menu and you can add terms to each of them.


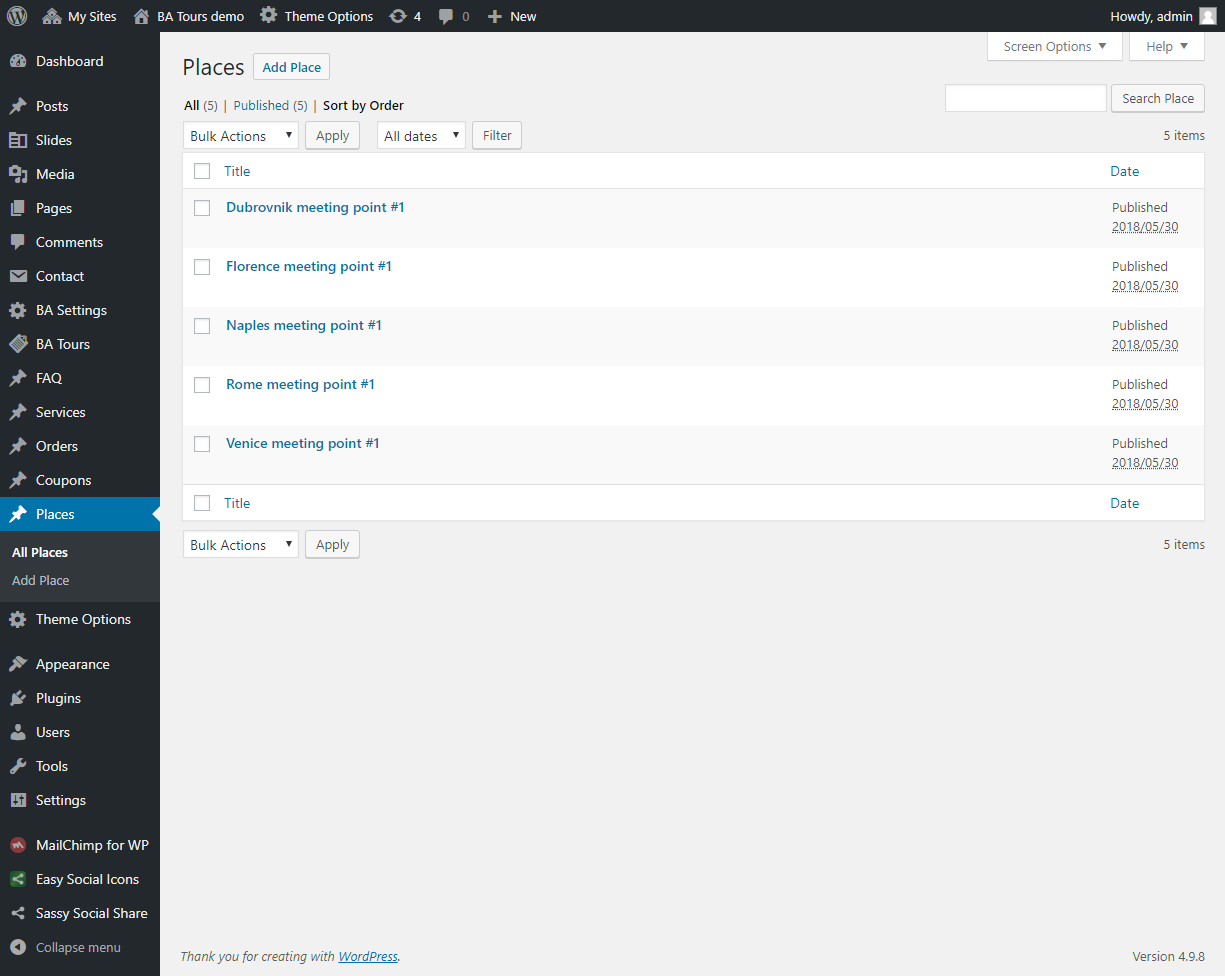
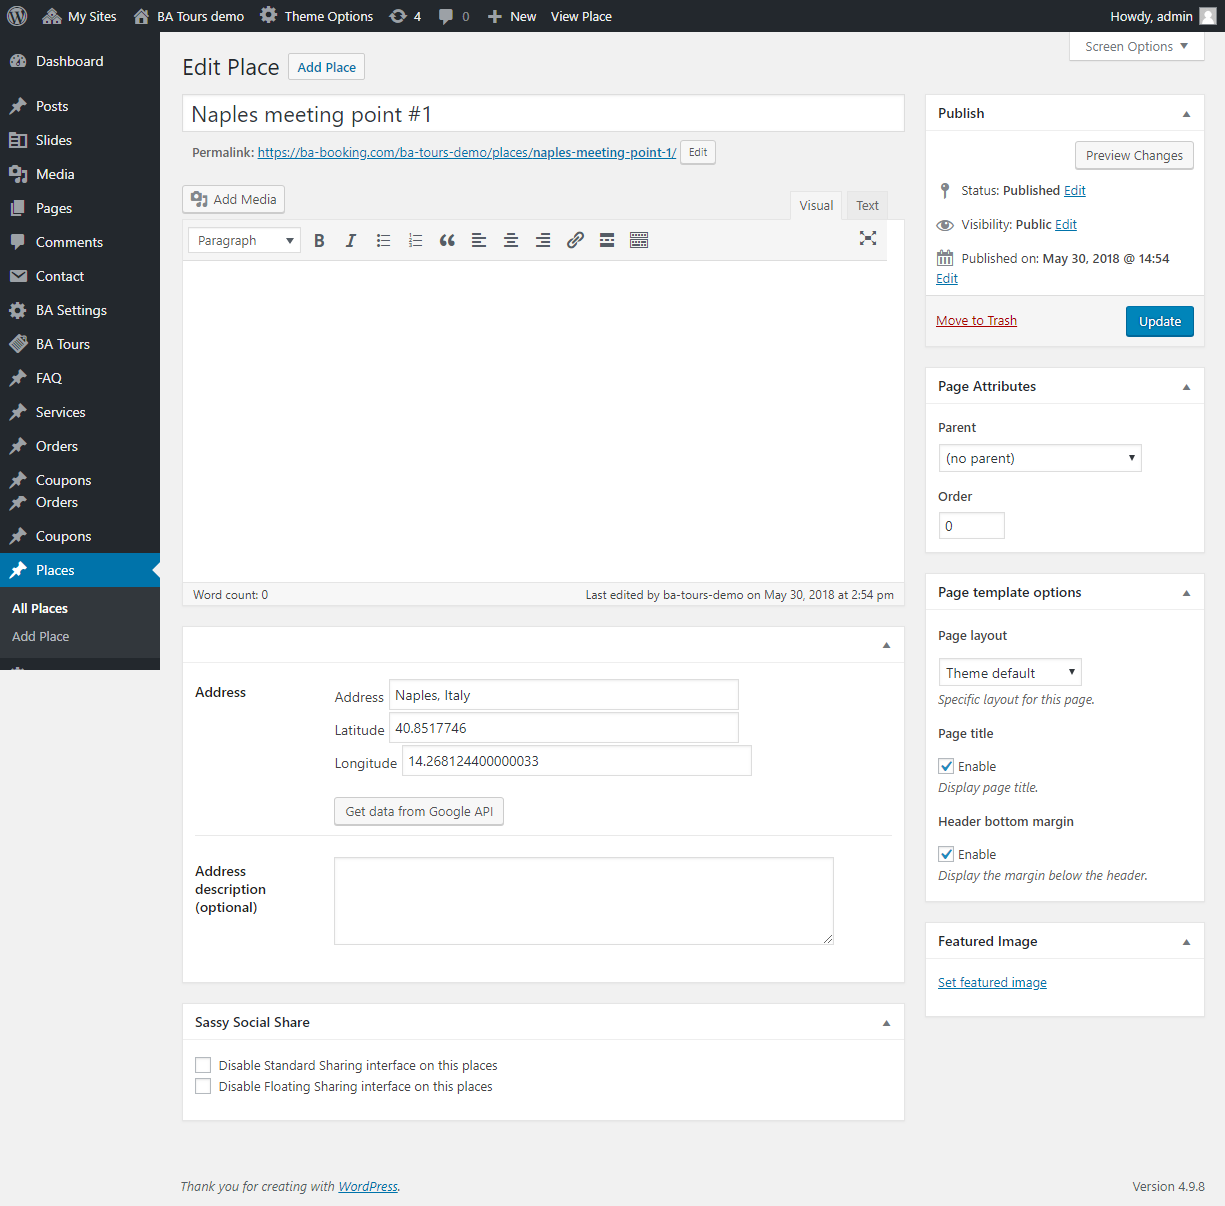
If you want to use meeting points in your site, create places post for each meeting point via Places menu.


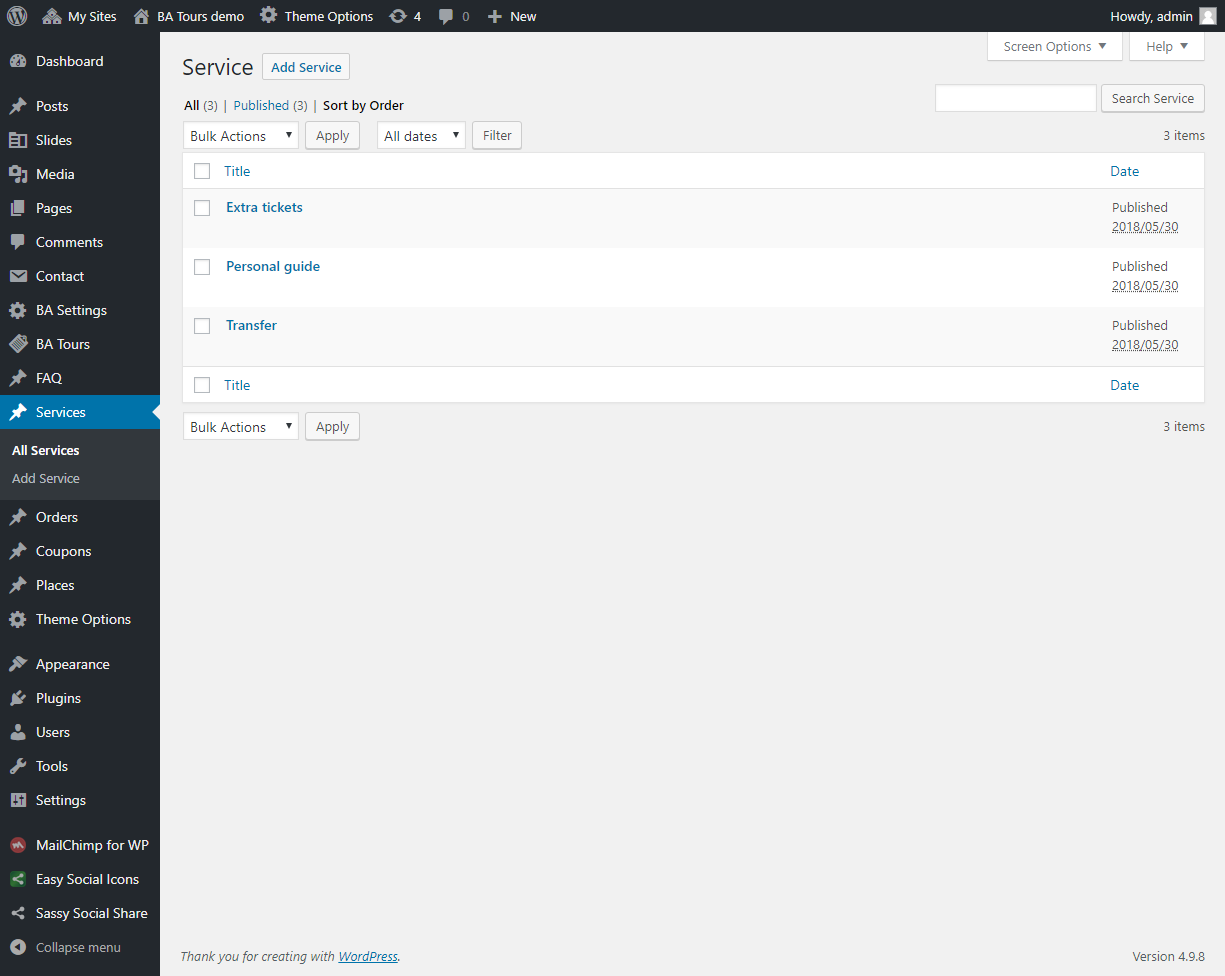
Create all extra services via Services menu. You will select needed services later when will edit tour posts.


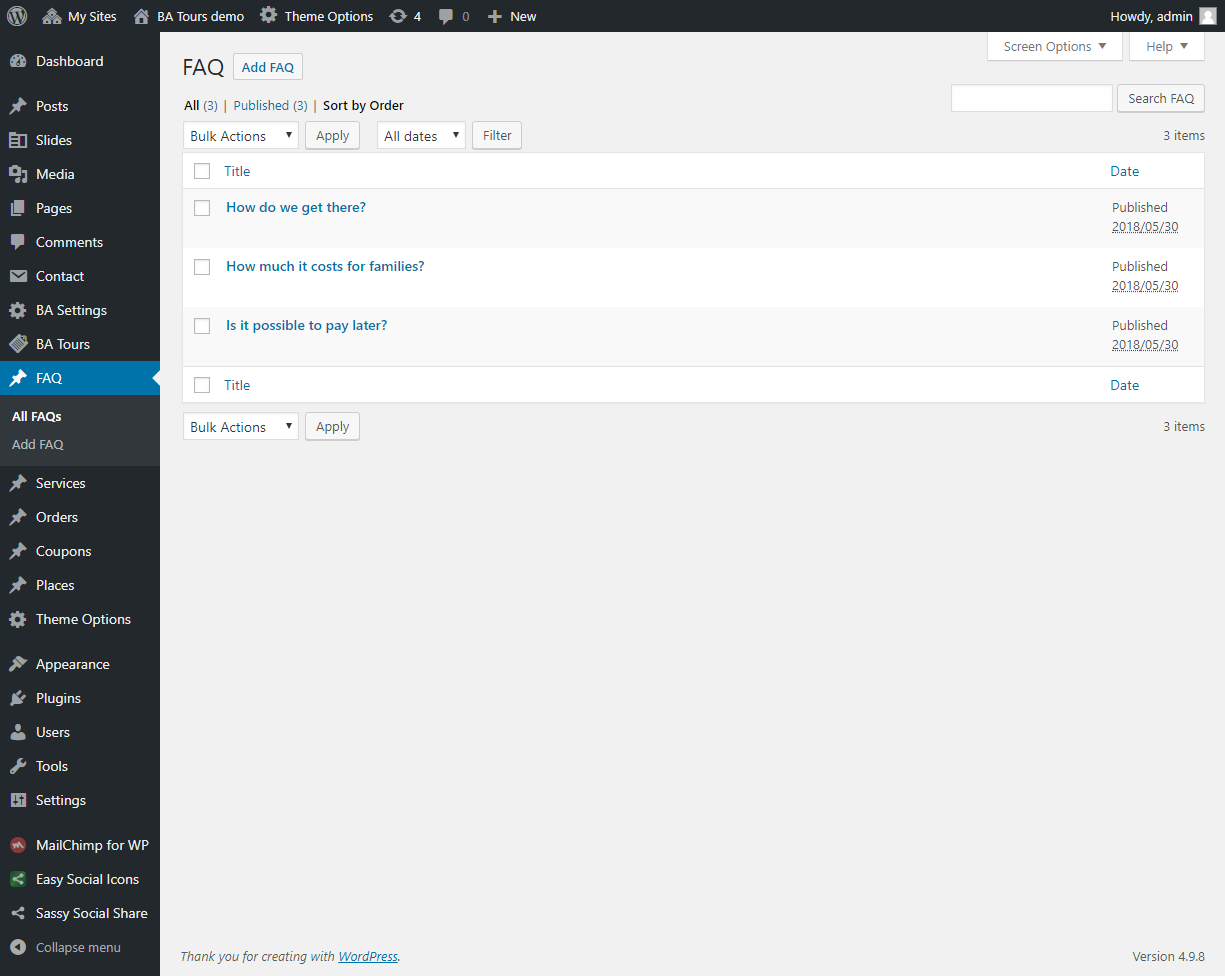
Then create all Questions & Answers via FAQ menu for future use.


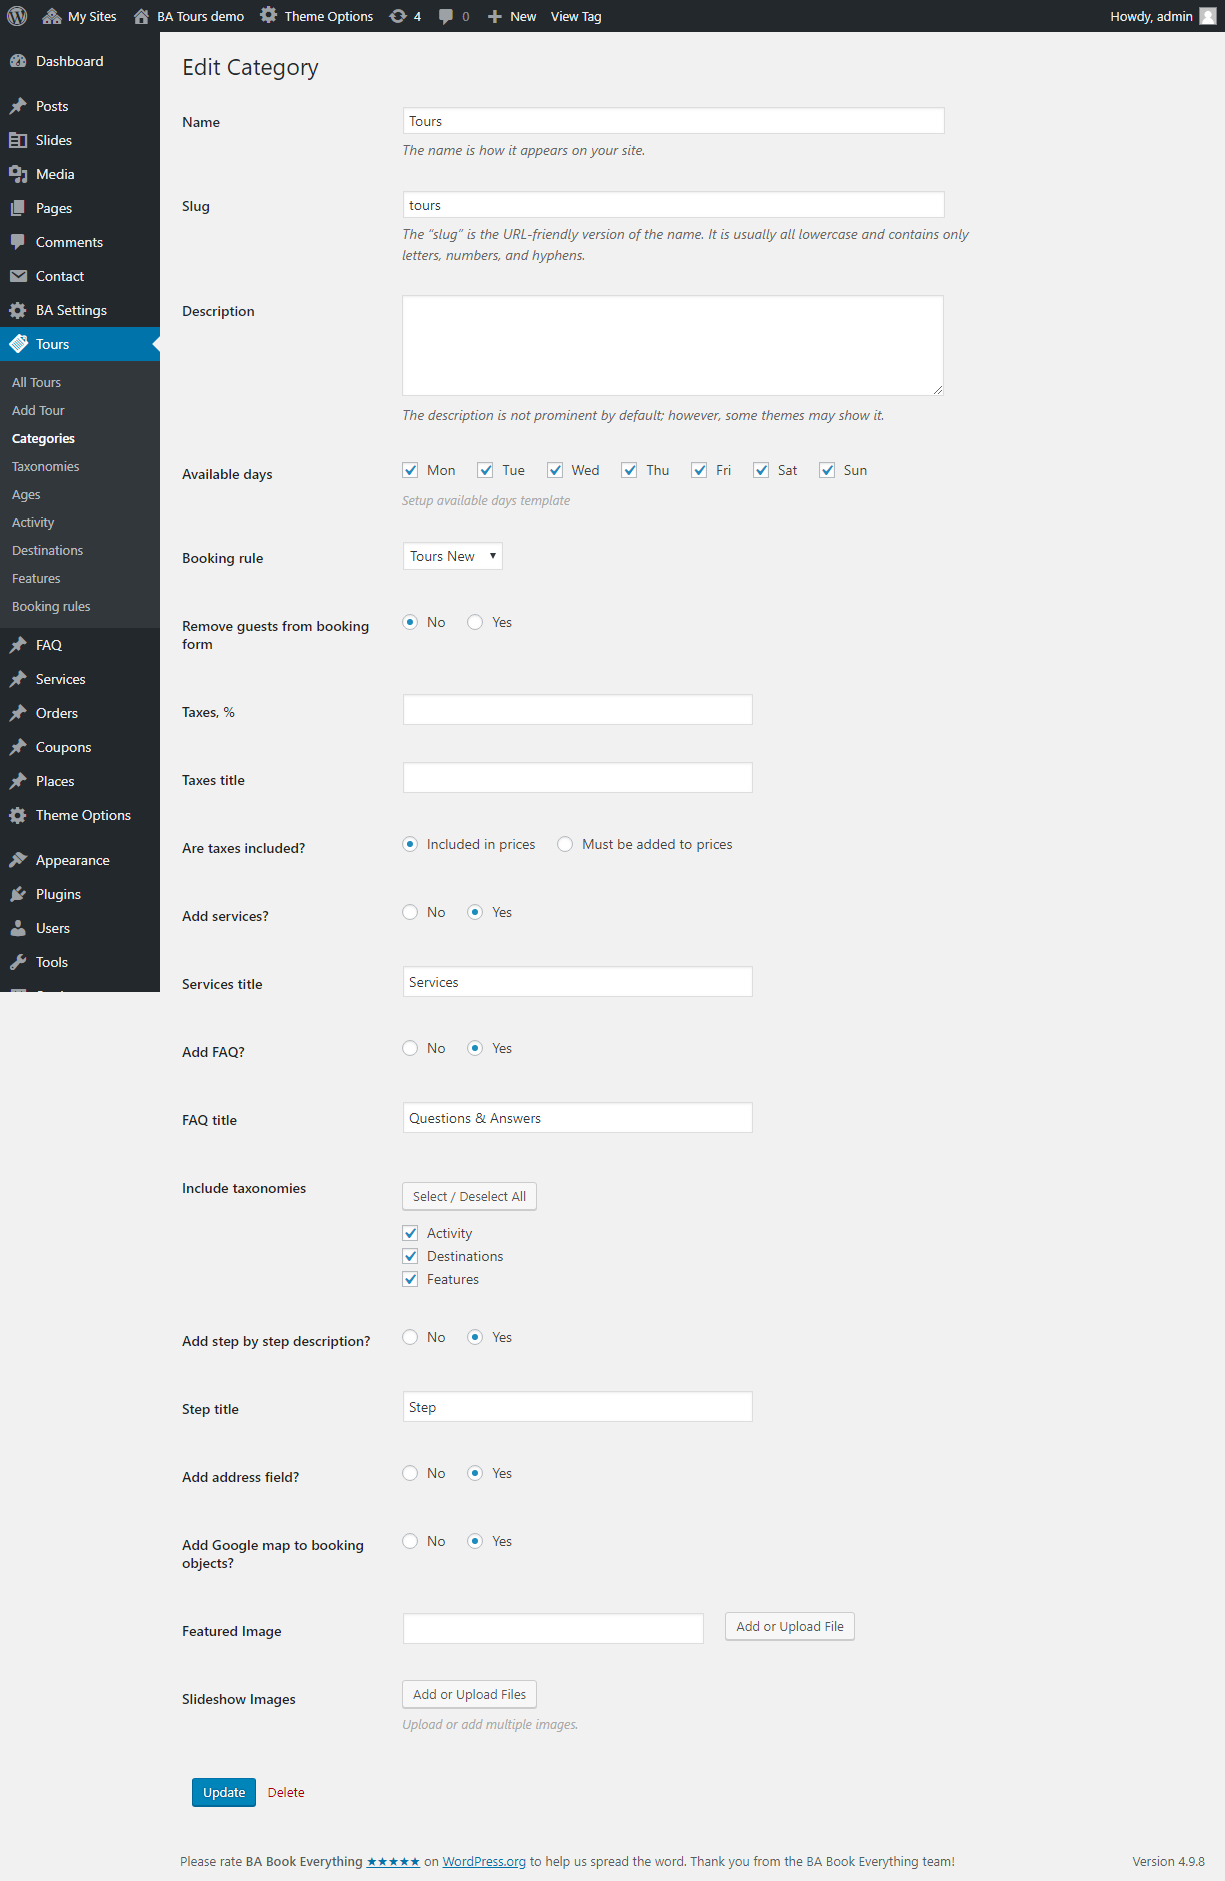
The final step before adding tour posts is creating category Tour via Categories menu (BA Book Everything plugin allows you to create categories for each of your rental business, like tours, cars, hostels etc., and use them on one site). You need to create at least one category to start.


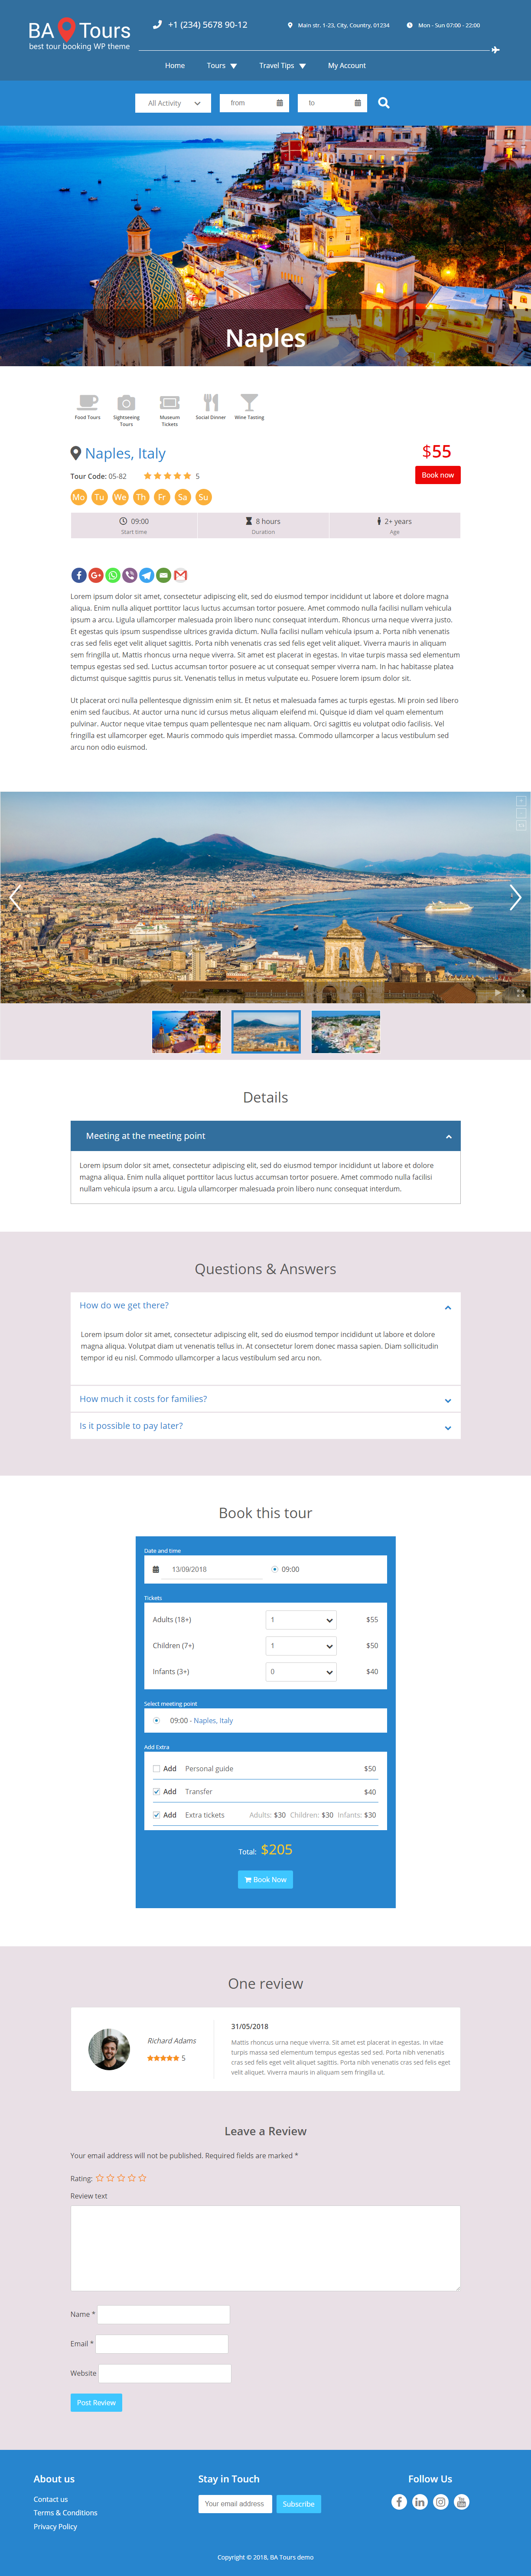
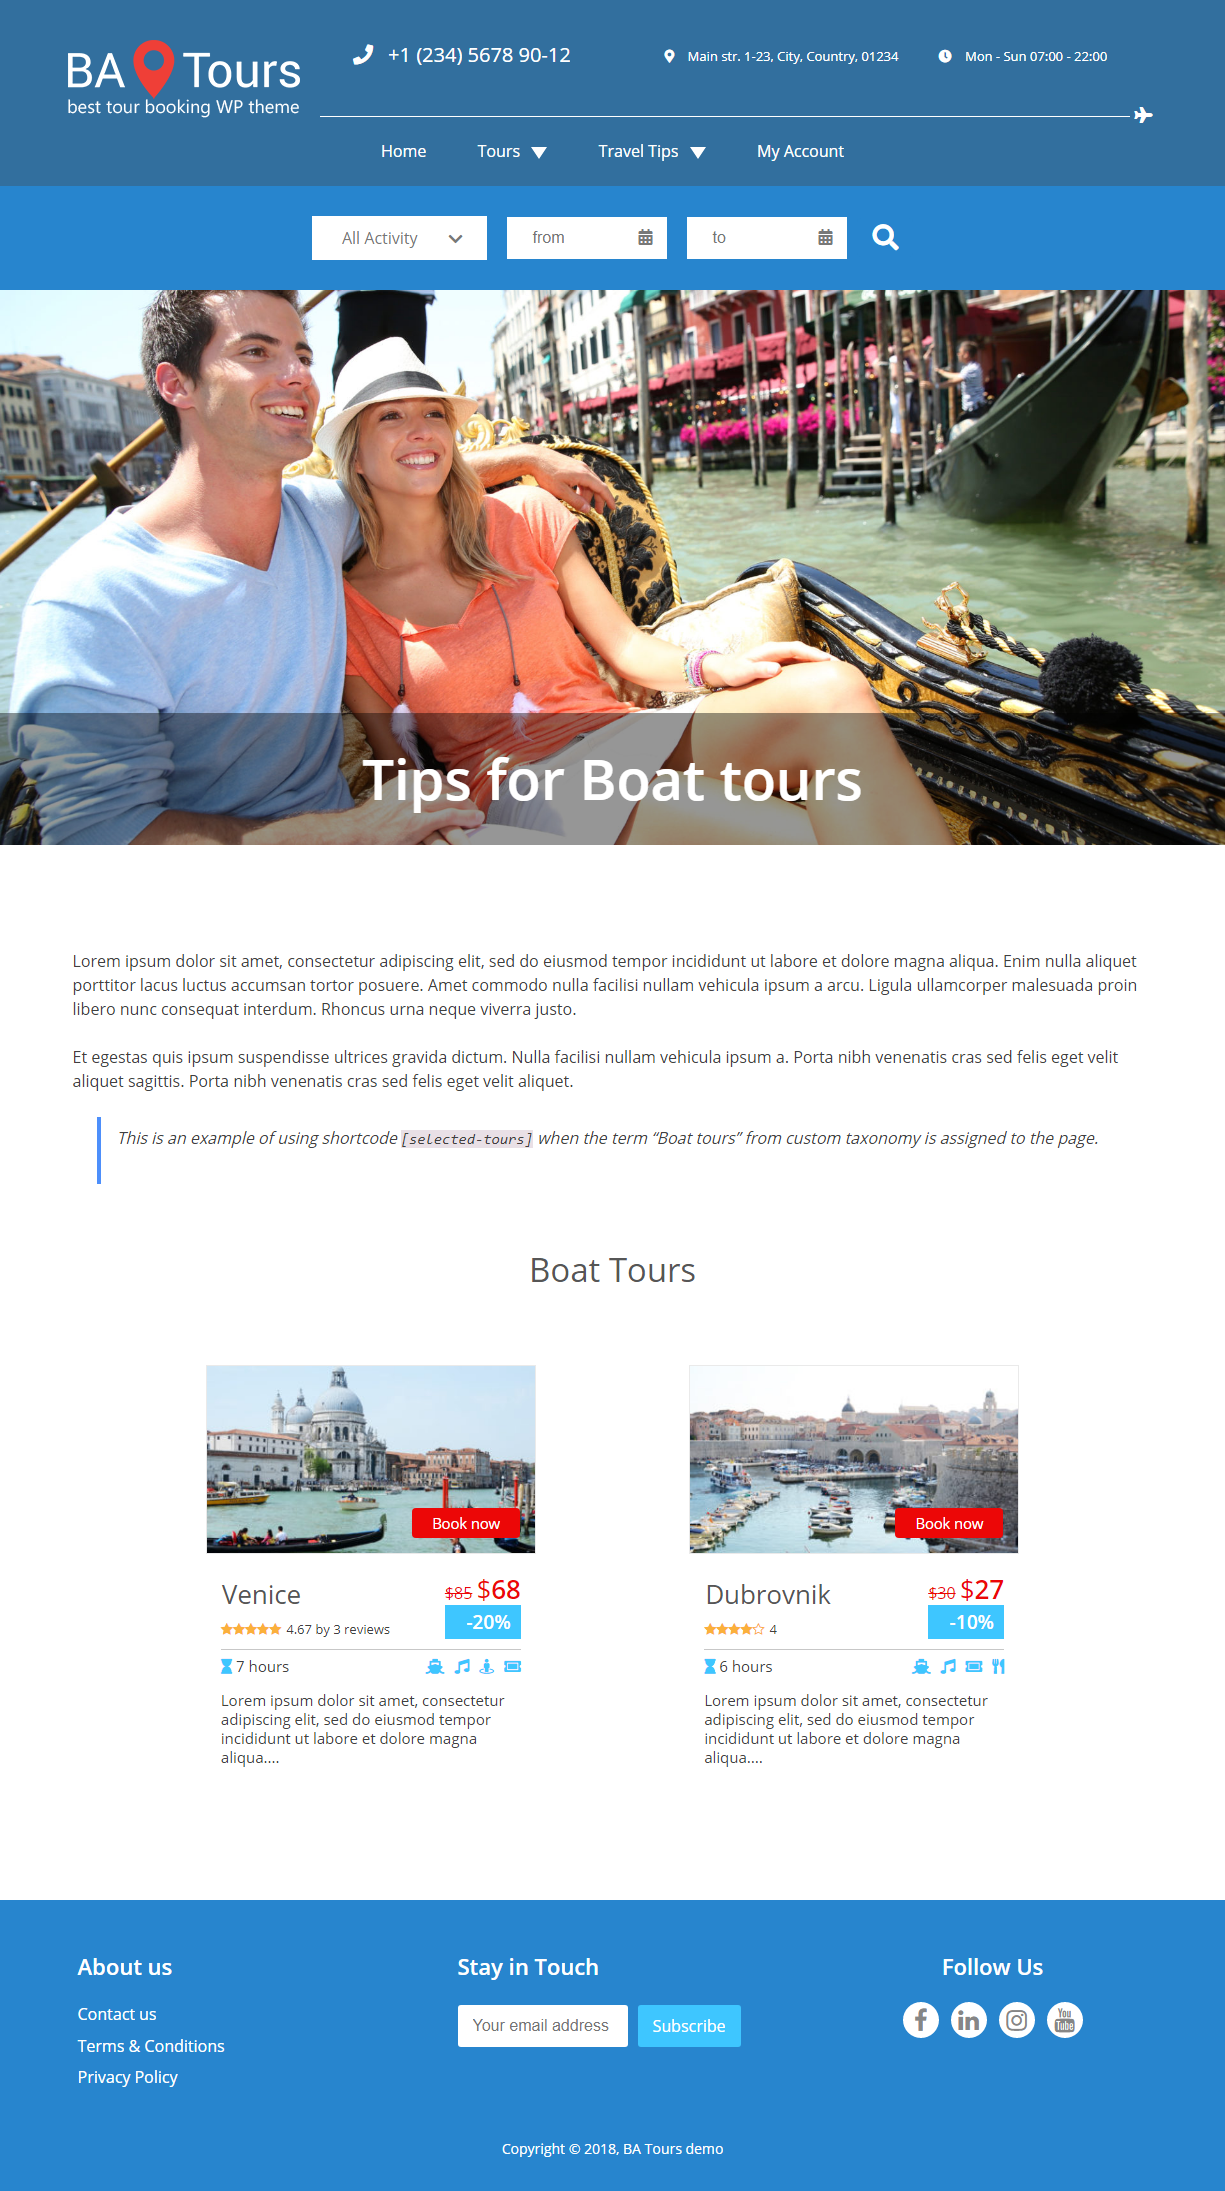
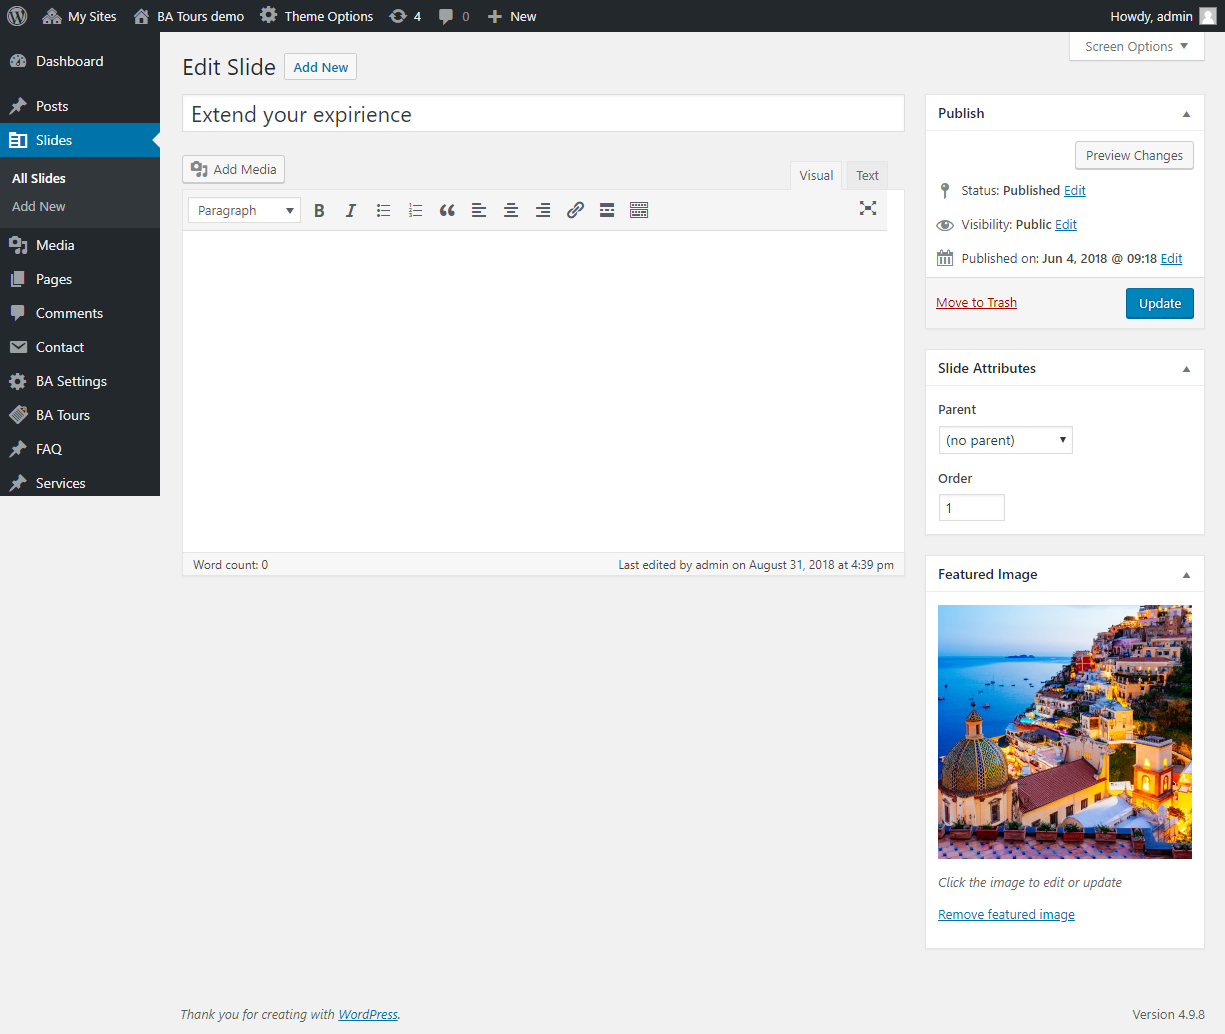
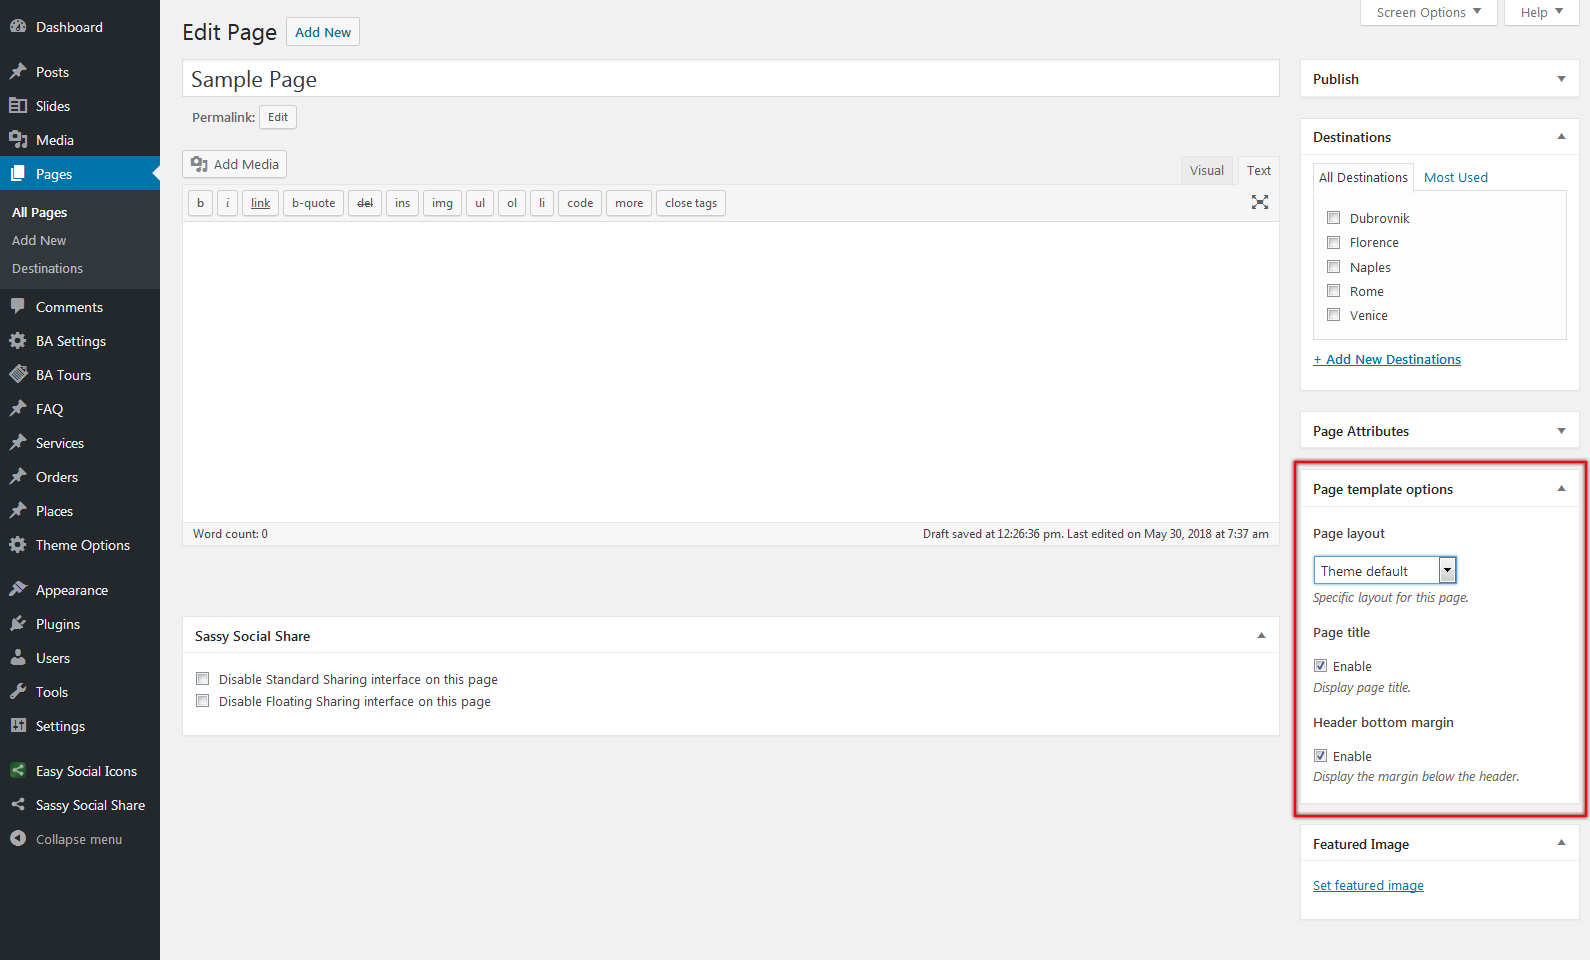
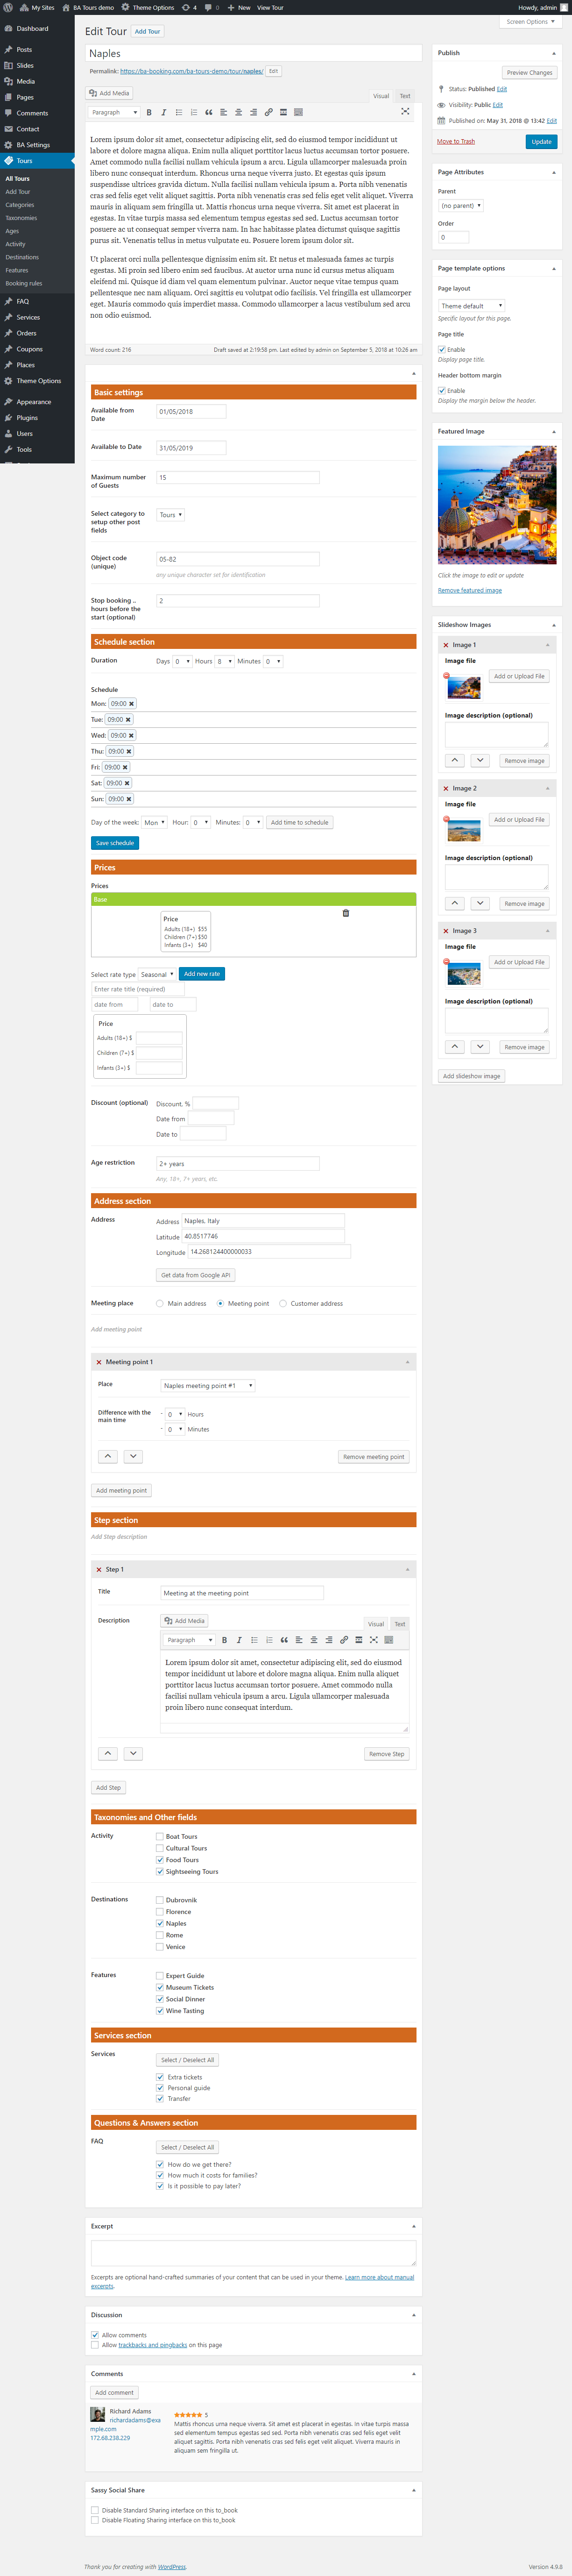
After these steps you are ready to add tour posts. Below is an example of editing a tour post on our demo site.


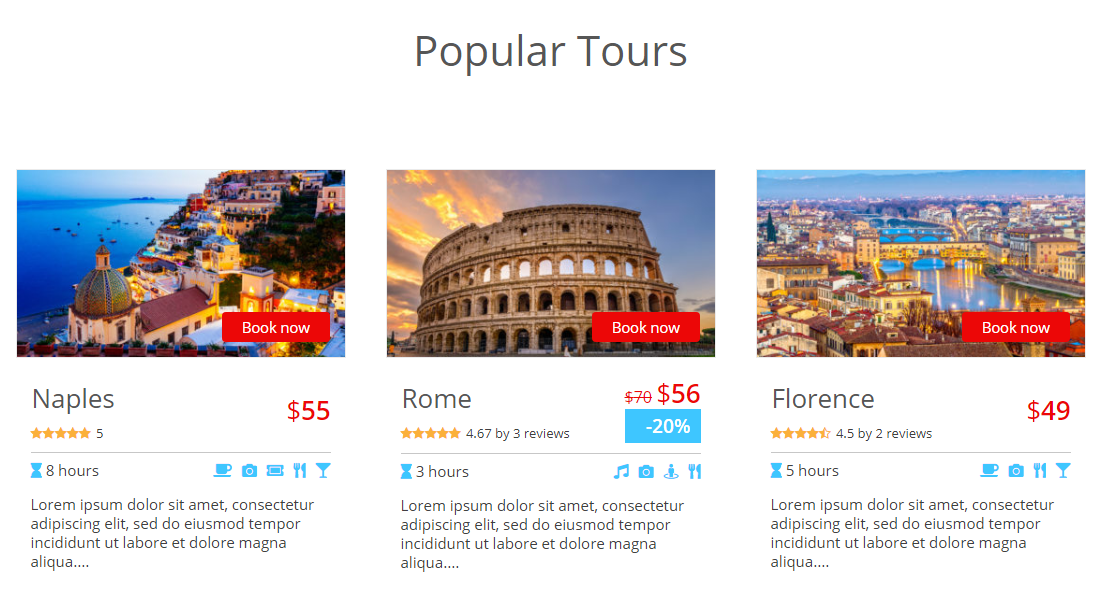
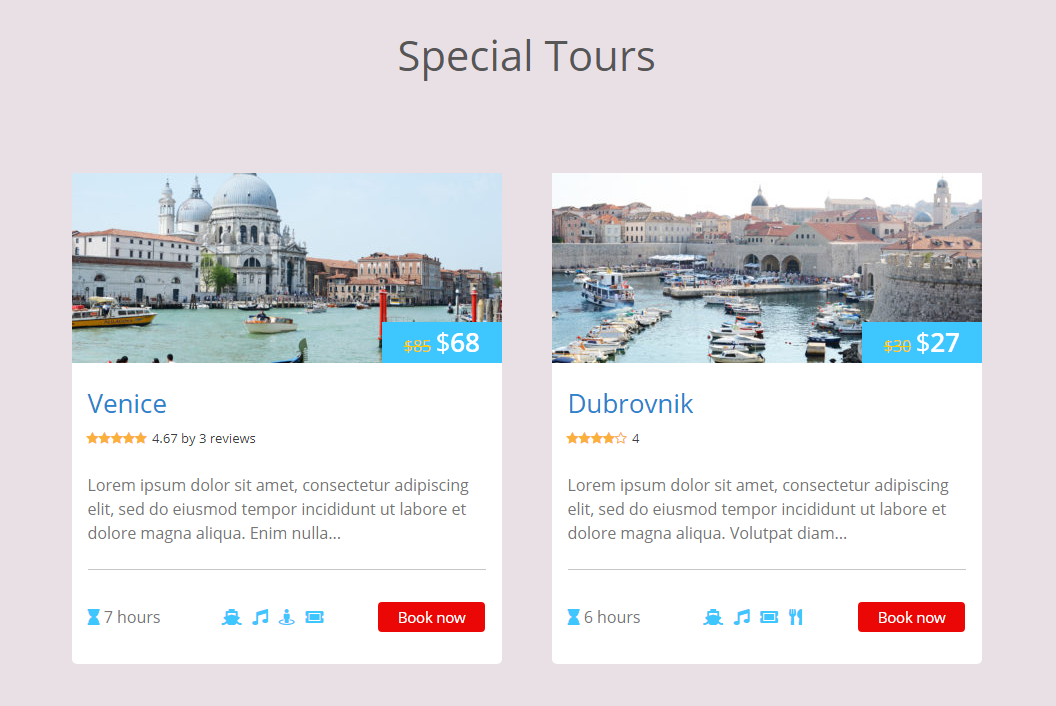
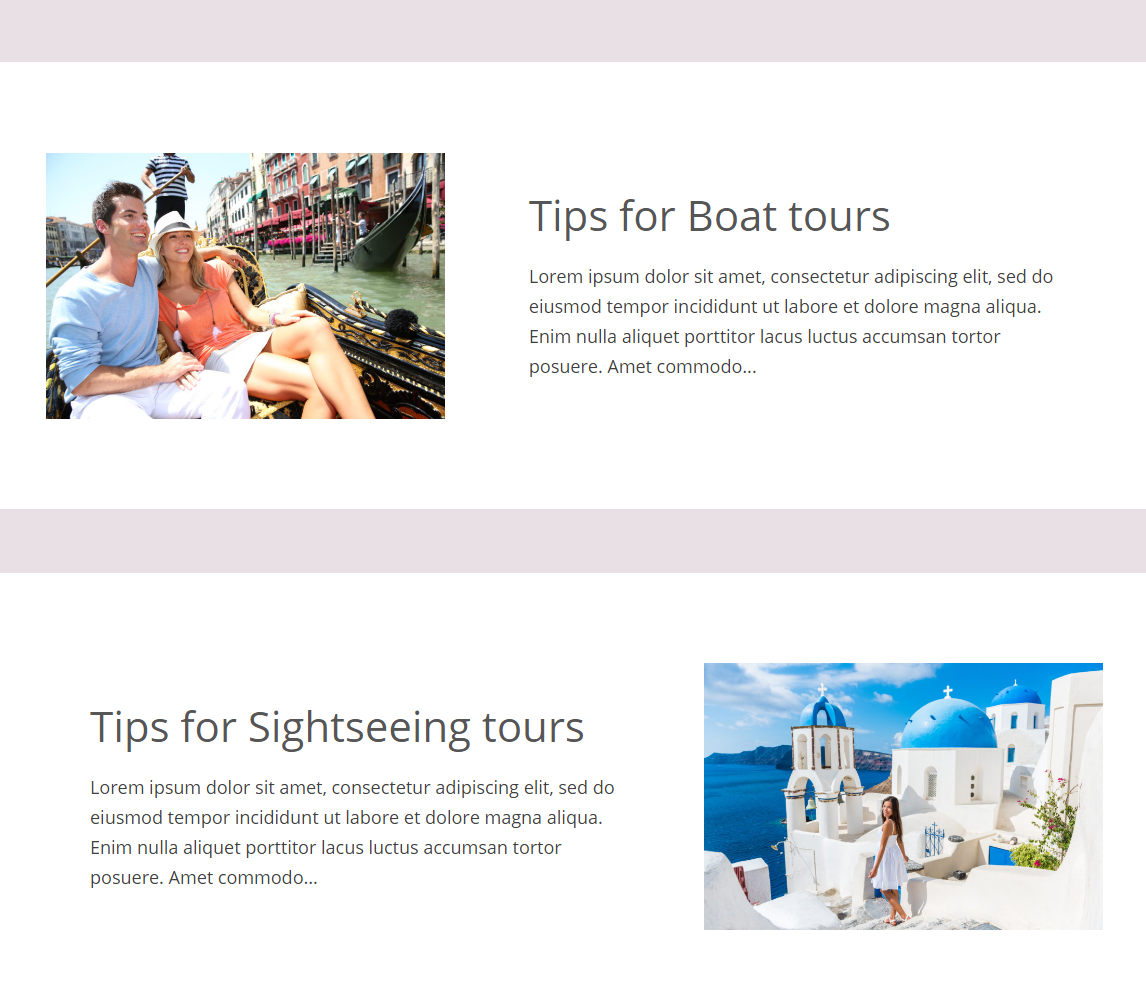
After saving tour post it will appear on your site and look like this:


Recommended Plugins

BA Tours theme comes with several plugins which will extend the theme basic functionality. The most important is BA Book Everything plugin. It’s free (hosted on official WordPress repository), required to create tours and to make the most of the theme features.

The second required plugin is “BA Tours posts”, which contains useful post types and shortcodes.

To accept payments you need to install “BABE Payment Pack” plugin, which is also included in theme files.

If you have no preferences, we recommend to use “Contact Form 7” plugin to build forms on site pages and “MailChimp for WordPress” plugin for subscriptions.

“Sassy Social Share” and “Social Icons” plugins will be handy for adding social sharing icons on tour pages and your social profiles links in the footer area.

Go to “Appearance -> Install Plugins” admin menu to install and activate plugins.

Installation

Your installable WordPress theme file is ba-tours.zip.

After buying a theme, you downloaded ba-tours.zip file that is the theme installation file.

You can install the theme in two different ways:

1. WordPress Administration Panels

Navigate to Appearance -> Themes page to access theme uploader screen, select “Add New” and upload ba-tours.zip file.

2. FTP

Extract ba-tours.zip file and upload the extracted ba-tours folder to /wp-content/themes/ folder on your server. The WordPress codex contains instructions on how to do this here.

After uploading the theme, you have to activate it. Navigate to Appearance -> Themes page to activate the theme.

Updating

  • Download the latest package and extract it
  • Find “ba-tours” folder inside the package
  • Use FTP to overwrite current theme folder on your server with new one

Introduction

Welcome to BA Tours WordPress booking theme documentation.

It’s a WordPress theme based on BA Book Everything plugin – the really fast, flexible and powerful Booking engine with management system.

If you are not familiar with using WordPress itself, please first visit and learn from Official WordPress Codex.

Documentation is related to BA Tours theme and explains how to setup and use most of its specific options and features. If you are having an issue and can’t find the answer here, please contact us via contact form and we will try to answer as soon as possible.

Also, feel free to suggest any new features you may want in this theme and we will consider adding it for the next update(s).

Cookies

This site uses cookies to enhance your user experience and analyse traffic to improve this website. By clicking any link on this page you are giving your consent for us to set cookies. Please, see our Privacy Policy for additional information.
Scroll to top